Drawing A Self Portrait From Life
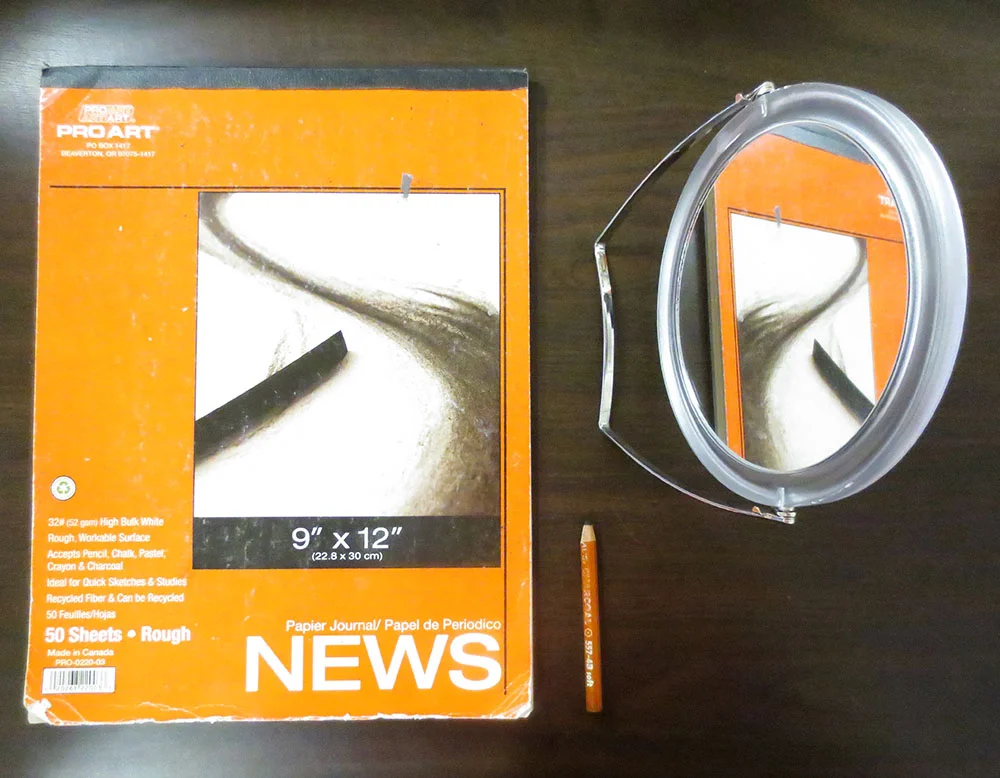
Materials
- 4B charcoal pencil
- newsprint pad
- mirror
- kneaded eraser (optional)
I like to use a 4B charcoal pencil because it allows me to build up the shading gradually, but you could use any kind of drawing utensil you want. You could even start with an inexpensive regular #2 pencil.
I like newsprint because it's cheap and the charcoal goes on it very smoothly. I find it easier to draw when I'm not worried about wasting expensive paper.
I don't like using an eraser when I work on quick drawings like this, but if you want you can use a kneaded eraser.

Step 1
Set yourself up with your mirror angled however way you want. Remember you'll be drawing yourself from the same angle, so choose a relatively comfortable pose you can maintain for several minutes.
Remember to keep your eyes on the mirror 80% of the time. You're drawing what you see, so you should spend more time seeing than drawing. Don't worry about making the drawing look like you. Worry about translating the shapes you see within your face down on paper. When you see your face, don't think of it as being made up of a nose, eyes, lips, ears, etc. Think of it as a structure made of many shapes.
Don't ask yourself things like does this look like a nose? Ask yourself, does this shape look like the shape I see in the mirror? Is it rounder or more elongated? Is it wide or narrow? Is this pointy or curved?
Trust your eyes and ignore your mind when you draw. You'll be surprised with the results.

Step 2
Start by drawing the overall shape of your head first. Consider the contour of your head and face and how each area is proportioned to one another.
Ask yourself where your hair ends and where your neck begins and where your ears are placed in relation to these. Can you see your ears? Are they at about the midpoint of the overall shape of your head? Above or below the midpoint? Note where your hairline is and how much space your hair takes in relation to the rest of your head.
Take the time to study your face before you put any marks down on paper. It's ok to take a while.
At the beginning stage, make sure you focus on the greater shape of your head, including your hair, ears and neck; not individual facial features like your nose and eyes.

Step 3
Slowly begin putting down marks to indicate where your major features are located. I normally consider the entire eye socket first before defining where the eyes themselves are. That's roughly the area between your eye brows and your cheek bones. I'll put a mark down to indicate where the eyebrows and cheekbones are. Then roughly where my nose ends (I see it as the triangle that's formed between your nostrils and the tip of your nose). Then a line to indicate the middle of my lips. Then where my chin ends and my neck begins.
Note the angle you're seeing yourself from. Is your chin closest to the mirror or is it your forehead? The closer something is to the mirror, the larger it will appear.
Note whether your eyes are tilted one way or another. All of your features will follow the same tilt.
Tip: the eyes are usually located in the center of your head, so make sure you're not placing them too high up or too low. Compare the distance between your eyes and the top of your head and the distance between your eyes and your chin. Are they about the same or is one greater than the other?
Ask yourself questions like how far are my lips from my nose? What is the distance between my eyes? How much of my cheeks do I see? Where are my ears in relation to my nose and eyes?

Step 4
Use shading to help you define the shape and volume of your features. Remember your eyes are resting within sockets, so there will be shade around them, especially near and around the nose. Don't be afraid to exaggerate the shading to bring out the forms.
I suggest you avoid putting too much effort into the hair and tiny details like eyelashes. Especially as a beginner, you'll learn the most when you focus on getting the overall shape and proportions of your head right.
I consider drawing individual hairs and eyelashes a waste of time. If you want to draw something perfect and realistic, you'd do better working from a photograph. If your purpose is to learn to draw a face, forget the minor details and focus on the greater shapes and proportions of the face.

Step 5
I like to leave the eyes and eyebrows toward the end to avoid getting distracted by them. The eyes are normally the focal point of a face, so it's easy for us to get caught up trying to get the shapes just right and ignore the rest of the face. Don't do that or your drawing will suffer from it.
Once you're happy with the placement of the features, continue to push the contrast between light and shadow. I prefer to block in the shadows, building them up without worrying about being too subtle. This is especially true for quick drawings, like this one. This portrait took about 9 minutes.
NOTE: You'll notice I pause often. This is not time I spend looking at how good or bad my drawing is looking. These are moments I take to look up and study my face before I continue drawing. Again, remember to keep your eyes on the mirror 80% of the time. You're drawing what you see, so you should spend more time seeing your face in the mirror than drawing!